Virtues: Something I wouldn’t know about

Hey guys! I am once again asking for your patience with me and my blog as I attempt to get in the habit of writing. I know the last time I promised to write I was on a train in Innsbruck and I was full of false hope that I would, upon return to the states, resume my passion for writing and not get caught up in the hustle and bustle of my new job and anything else thereafter. This time I think I have a pretty solid plan when it comes to consistent posting. While I was abroad over a year ago (before the Pandora of course), I kept a journal- nothing too fancy, maybe a page or two a day- and I would like the opportunity to share my day to day experiences and thoughts while traveling with you, as well as a photo or two. I’ll try to be consistent but… well… we know how that’s gone for me in the past. Thanks for following along and I’ll see you all again soon!

How to travel: A bullet list

  • 1. Know where you want to go.
    • This may seem like the easiest, most obvious thing, but it’s not always. To keep track of where I want to travel I have a journal with a list and every time I see a cool computer background, Pinterest post, Facebook post, or think to myself ‘you know, I bet the Netherlands are cool’, I’ll write it down and maybe add a little blurb if there’s something specific that I want to do there ( ex: Holland (Tulips in the Spring), Switzerland (Skiing)).
  • 2. Map it out
    • Google maps has this really cool feature that allows you to create maps of places that you can mark in advance. This makes it easy to travel data light and to see everywhere you want to go in one easy to read format.
    • Don’t know how to use the Google ‘My Maps’ function? (I’m not sure how to link posts, but check out my previous step-by-step post on how to use My Maps)
  • 3. Calculate budget.
    • Look at travel costs.
      • If flying, use Google flights. Don’t look solely at the place you’re traveling to and if you’re not too picky, don’t look at direct flights. Especially when going out of country. For example, I live in Illinois which means I’m pretty close to Chicago’s international airport, O’Hare. Let’s say I want to spend…. a week in Barcelona during the month of April. That’s all I know. First I hop on Google Flights and say that I am flexible with my dates (1 week, during April) and that I’m flying from Chicago to Europe. That’s all the information Google needs to spit out that what would normally be a $2000 flight, can be $286.00 if you fly Air Portugal and don’t mind a 2-3 hour layover each way. Not sure about you, but I’m willing to wait 3 extra hours to spend almost 10% of what it would normally cost. If you want to go somewhere like Vienna but see that tickets are $400 more, book a flight to Barcelona, then book a flight from Barcelona to Vienna a day or two later. Tickets within Europe are laughably cheap, the day or two will help with jet lag, and who wouldn’t want to spend a day exploring Barcelona as a bonus?
    • As a rule of thumb, I have about $2000 budgeted before I look at traveling overseas, and I give myself a guestimate when it comes to road trips for gas, hotels, and food. This helps me budget for the trip. If round trip tickets are $286 and I have ~$2000 saved up that leaves me a lot of wiggle room for a spontaneous trip to Rome after Vienna to catch my flight from Barcelona back home to the states.
  • 4. Abroad Only: Applies to Europe (and maybe other countries?)
    • When going abroad there are a few extra things that you’ll need to think about than if you’re just going on a road trip a few states over.
      • Phone Plan: There are a few things you can do.
        • 1. Go without data. I did this for a semester and it’s totally doable, but you have to plan ahead and make sure that all of your plane tickets, hotel registration documents, and Google Maps of the city are downloaded prior to leaving so that you don’t have to worry about finding WiFi.
        • 2. A new cell data chip. This can be more time consuming than anything. Stores and hostels across Europe will give you the option to buy data chips to put in your phone that are pre-loaded with set amounts of data.
        • 3. An international phone plan. This was probably my favorite way to travel. After my semester abroad with no data, I returned and traveled for about a month with Google’s GoogleFi unlimited plan. This was so easy to use and almost seamless. It would recognize when I was in a new country and update my connection automatically. I am also the proud owner of a Google Pixel 3a so it came highly recommended for my phone as well.
      • Wallet: Cash is king, but when in doubt, Mastercard.
        • Expect to leave Europe 5lbs heavier with change. That being said, make sure that you have some sort of a coin purse with you. “But Raye, can’t I just pay with a credit card or do tap to pay?” No. There are some restaurants that take cash only and I highly recommend that you have 20 euros on you at all time in case you get caught in a situation where they only accept cash so you can cover yourself. I also recommend bringing a bank card so you can make withdrawals at an ATM and if you’re going to bring a credit card I recommend MasterCard. It might not have the best benefits, but it is the most widely accepted.
      • Passport: I keep my passport in a passport holder that doubles as a wallet so all of my stuff is in one convenient location.
        • If you’re going to keep it in your bag, make sure it’s in an inside pocket and that that pocket has a zipper on it.
      • Use COMMON SENSE.
        • Don’t flash your passport or cash everywhere
        • Don’t walk around with a bag that has a broken zipper or holes in it
        • Keep your things in sight at all times when in public
        • Before leaving any location make sure that you have the four essentials: Phone, Wallet, Keys, Passport.
  • Places to stay
    • I use Google Maps or Air BnB for this.
      • You can go to Google maps and search “location + type of housing” and it will pull up the location, the price, and the type of housing. For example, if I wanted “London Hostels” it would find me all of the hostels in London and I could pick one based on location, price, and google ratings.
      • I use Air BnB when I’m going somewhere a little more remote or know that I will need a single room and time away from the hostel life (It’s hard being an omnivert with a perchance for wanderlust). Air BnB is especially cheap in small towns that are still tourist traps. I recommend looking for Air BnBs in countries like Greece, Poland, and Eastern Austria.
  • Packing:
    • I like to pack basic clothes (plain black shirt, plain white shirt, jeans, a cardigan or two) and then lots of undergarments. You can buy as many souvenir shirts and shorts/ outfits as you want, but the classics will look the best in photos and no one will really question why you’re wearing a black shirt in 50 photos, but they might wonder why you’re wearing the same rainbow shirt in every single picture on your three day vacation.
    • By packing light you have more space for food. By the time you’ve eaten your food, you’ll be in need of space for souvenirs. Food for thought.


Now it’s time to get out and GO! Have fun and don’t forget to bring your charger, live in the moment, and most importantly, stay safe but have fun!

How to create your own Google Maps

Hey guys! This is something that I learned about while still in college and it’s something that has helped me plan trips, do site visits at work, and is just a really good tool to have in your tool box for any situation.

Google has this really cool feature called ‘My Maps’. The name changes from time to time as Google updates, but the functionality has stayed the same and it has saved my butt time after time. What it does is allow you to save specific locations on a map. You can do this in different layers as well, similar to how Photoshop allows you to manipulate layers so that you only see certain things- Maps will allow you to create layers so that you only have to see certain points. A good example of this would be a travel map. Let’s say you are going to Paris and want a map of everything to do. You can create one map and multiple layers on that map. On one layer you can put all of your sight seeing destinations, on another map you can put all of the places you want to eat, on another layer you can put all of your hotels. You can also color code everything, but we’ll get into the  gritty details here in a bit- for now lets stick with the basics. Let me shut up and show you.

  1. You’re going to start by opening Maps. Make sure that you are signed in so that you can save your maps. 1
  2. Navigate over to the three lines in the left corner of the search bar and click it. This will open your menu.
    • 2
  3. Go to ‘Your Places’
    • 3
  4. Here you have your more personalized options. You can set your home location, your work location, etc. This comes in handy if you’re like me- instead of trying to navigate google all the time when you’re somewhere new, all you have to do is say ‘Okay Google, Go Home’ or ‘Okay Google, take me home’- something to that effect, and it will navigate you to the location you have set to home. What you want to do on this screen though is go over to where it says ‘Maps’. This will open a screen of all of your saved maps.
    • 4
    • As you can see, I personally save each new city as a new map and not just a layer so that I can go more in depth when it comes to my layers, but in this tutorial I’m gonna keep it short and sweet by keeping all the cities to one map on different layers
  5. You’re going to ‘Create Map’ and this will pull up a fresh Google Map. 5
    • From here there’s a lot of things that are important in staying organized. You’re going to want to label your map. To do that you simply click on ‘Untitled Map’ and type in the new name for the map in the popup window. It will also ask if you want to give a description which is optional.
    • I recommend that you name your layer where it says ‘Untitled layer’. You can change the name the same way that you changed the Map name, by clicking on it and typing in your new desired name.
    • Where it says base map, that’s not really important (in my opinion) unless you are very particular in how you view maps. The standard base map is what you see when you open Google Maps but you also have the option of satellite, terrain, light political, mono city, simple atlas, light landmass, dark landmass, and white water. Again, that’s just how the map appears and isn’t going to be super important in this tutorial- it’s just a neat little feature.
  6. Here I’ve labeled the map ‘Travel’ and the first layer we’re going to work with ‘Paris’
    • 67
  7. To start adding to your layer, you are going to search for your first location like you normally would if you were trying to find a location in Google Maps. Let’s say we want to first go to the Arc De Triomphe:
    • 8
    • It’s going to pull up the location with a little blurb. At the bottom of the blurb you will see where it says ‘+ Add to map’. By clicking on that, it will add the location to all of the selected layers on the navigation bar on the left. Note that ‘Paris’ is still checked. If you have multiple layers, make sure that only the layers that you want to add the new location to are selected, otherwise you will have to delete the location from unwanted layers individually and that can be annoying if you have many layers… not that I would know or anything…9
    • As you can see in this image, I have clicked the ‘+Add to map’ button and there is a new location under my ‘Paris’ layer with a blue location marker that corresponds to a blue location marker on the map. Before I click out of this blurb or go to my next location, I have a few options.
      • I can change the color of the location marker. This may make finding it later easier because as you can see, it is a similar color to other tourist markers. You can do this by clicking the paint can on the blurb, or by clicking the paint can that appears when you hover over your location on the control bar. You can change the color and the shape of the icon to make it stand out more. Picture1
      • I can edit the description. You can add any notes about this location you wish and you can also delete/edit the description it is given. This will only be visible to you and anyone you share this specific map with.
      • I can add a photo of the location. I will go back and add photos to some of the locations I’ve been so that I remember what I did there, or what happened. For example, if it’s a restaurant, I might add a picture of food that I liked in case I want to get it again another time.
      • I can add directions (the arrow button). By clicking this button I can make a map that has directions from another specific location. For example, if I want to go from the Eiffel Tower to the Arc De Triomphe I would click that button, type in the Eiffel Tower as my starting point, and add to my map. Those directions would appear as another layer in my map
      • 10
      • You can delete a layer by clicking the three dots next to the layer and selecting ‘Delete layer’.
  8. To add a new layer to put new locations you’re going to click ‘Add layer’ at the top of the control panel. A new layer will appear. Make sure to un-select all other layers before adding new locations to this layer, and don’t forget to name your layers to stay organized. 11
    • Here’s a map with three layers, each layer a different city with 4 locations. I’ve changed the colors of the markers in each city so that the cities are color coded. You can color yours however you like.
    • As you can see, all of my layers are selected which means that all of the cities and locations that I’ve chosen are showing. However, lets say I only want to load the locations that I’ve chosen for Rome: All I would have to do is un-check the markers in the boxes by the name in the control panel. This means that I have deselected the layer and can no longer see or interact with the items on the deselected layer(s)12
  9. There are many ways you can organize your maps and so many layer combinations that you can make: the (Google Maps) World is your oyster!


A step to be above and beyond:

  • You can add the same place to two different layers! Add all of your places to one place layer (example: Paris), then create another layer and add more specific things (example: Food). You can add a restaurant to both the Paris layer and the Food layer and then if you want food, you can click on the food layer and it will pull up all of the restaurants that you’ve saved! Keep it color coded and you can add all the restaurants in every city to one layer to save time.

If this doesn’t make sense or sounds like a lot of extra work that you don’t want to do, don’t worry about it and focus on your own organization methods. What works for me might not work for you- what’s important is that you know your own system. Have fun with it and I hoped this helped! Let me know if you have any questions or would like me to go further in depth on something!

New City, New Job, New Year, Same Me.

Hello and welcome back to my irregularly scheduled show ‘Life: Starring Raye’. On today’s episode of ‘I have no idea what I’m doing’ I nervously inform you all that I recently received a conditional job offer in a city about three hours south of my hometown. While this is an incredible opportunity and I am SO incredibly excited for this job, uprooting from somewhere I’ve spent my whole life to go somewhere ‘new’ is going to be really challenging for me. So we’re 100% playing this by ear (by we I mean me, but you’re reading this so you’re included. Don’t judge my grammar).

As previously mentioned, the new job is three hours south of where I live, which isn’t the farthest I’ve been before- in fact I used to make trips about twice a month to this city- however three hours is still a commitment and I will be leaving one of my two best friends behind. The other you ask? I’m dragging her along with me for the ride. Stay tuned!


New Beginnings: Take 3?

Keeping up with some sort of journal or diary has never been easy for me, in fact, I have struggled with this for years- ever since my elementary school teachers made me get nightly signatures in my homework planner. Damn I hated that thing. Recently though I have been traveling more and new and exciting things have popped up that I really want to share with anyone and everyone. For example, I’m somewhat freshly (as of May) out of a 4 year relationship, I’ve graduated college, gotten a job 3 hours south of my hometown (and I’m dragging one of my best friends with me), and I’m currently in the middle of travelling Europe for pleasure. While that sounds like the coolest and most relaxing thing that could ever happen- it’s not and these are the kind of things that I want to be able to write down for others to see and take what they will from it.

This attempt to restart my blog isn’t so that I can be the next big blog, but so that I can improve my writing, form new habits, and if what I’m saying helps others or gives you a good chuckle- bonus! Please feel free to comment or ask questions about what I’m doing!

See you all soon with the next chapter of my life ❤

Summer 2018

It has quite literally been a year since I have last updated my blog and I’m feeling a little stupid for letting time get away from me like it has. Quite honestly for a while I didn’t know what to write about and then I was suddenly overwhelmed with things to write and then I completely forgot that I even had a blog. Oops. However! I will be studying abroad in 2 months and would like to keep something of a travel diary for myself, my friends, my family, and anyone who might be studying abroad and is struggling the same as me. But I’d like to do a quick recap of what my year has been so far!

As I’m sure you all know, a LOT can happen in a year! Since my first hair-dying session last summer I have dyed my hair a grand total of 3 times since and they were all, in my opinion, absolutely stunning. Dying my hair was a big step for me because I had never really done anything to consciously stand out in a crowd. Being close to 6′ is enough to get a lot of “WOW you’re tall!” and “You must be great at basketball- no? Then volleyball.” when I have no physical coordination whatsoever. I knew that dying my hair was just going to set me apart further so I originally wanted to do something a little more subtle. Like a white/blonde- something that would look different, but not crazy. However, when I was sitting in the chair waiting for my hair to bleach out and staring at Pinterest hair ideas, I made the impulse decision to go for bright blue and I have never been the same since. Having hair that is anywhere between bright blue or pastel pink has given me a lot of confidence because for every old lady on the street or at work that says ‘Hmmm, I don’t know, I just don’t like it. A natural color would be better. I loved your hair. Why did you dye it?! You know I don’t like it. You know that’s permanent, right? Your hair is going to fall out any day now. That color just doesn’t suit you.’ there are at least 3 more of my friends, family members, and even strangers that will walk up to me and tell me how much they like my hair or ask me questions on how I got it done, where I did it, or will tell me how much they admire me for having the guts to bleach my hair and that means everything to me. (So shout out to my mom who encouraged me to get it done in the first place)

A quick explanation of my hair through these photos, I dyed my hair a lighter, brighter blue first. When that faded from my hair I dyed it a royal blue that faded to a purple/gray/green color. When that also faded back to white/bleached I dyed my hair a pastel pink and modeled different hair styles for Kristi (my amazing hair dresser) so she could enter photos of hair styles into a contest. When THAT faded back to a bleached white we experimented with my hair, dyeing it a rainbow of colors (turquoise, dark pink, peach, and a light blue/purple) that when washed out the first time was more of a blue with a purple stripe in the middle. However after the first wash it was blue on top with a pink stripe, a silver stripe, and blue tips. A second wash and it was blue roots with some pink, and the rest of my hair was a blue silver. Now my hair is mostly pink with purple/silver ends and I have loved every step of every hair fade that I have had. (Disclaimer: I chose the pictures that showed (hopefully) the best shot of my hair transitions that I’ve had so these pictures will have me making stupid faces or there will be pictures of my friends and family as well… but most importantly, please ignore the mess that is my room/bathroom)

Not only did I go on some crazy hair adventures, I also joined ANOTHER fraternity! As some of you might know, I am currently in Alpha Phi Omega the service fraternity. This just means that I volunteer a lot. But because my chapter of APO is so large it can be hard to find close friends and I wanted to get to know people with similar interests as me so I decided to rush Alpha Rho Chi, or APX. My pledge brothers were more than amazing and we all formed such a close friendship it’s honestly unbelievable. I wouldn’t trade my guys for anything! :’D

30742366_10216288658515139_6357047566469945309_n

I don’t want to make this post super long so I’ll end here and add more later! ❤


The Mile High State

Hello friends, family, and followers! ❤

This week concludes the eventful two weeks, and it’s not done yet! Jeremy (my boyfriend) moves back to Carbondale for college Sunday, I just moved in to my apartment down the hall Tuesday (and have been unpacking ever since), and just last week I was in Colorado! School starts up in a week or two and boy am I NOT READY! But that’s another post for another day.

Being more than 5,000 feet higher than what I’m used to at any given moment, in a place where the topography is literally mountains and not just over exaggerated hills, tends to leave one breathless in that the view is amazing and there is very little oxygen. There were times when I was short on breath simply by getting up and walking to the lodge (50ft away) for breakfast! But let’s start at the beginning of the trip before I get too far ahead of myself.

July 28, 2017: I dyed my hair bright blue, much to the dismay of some people, and great delight to others. It took about 6 hours (the bleaching and dying process) and my hairdresser was shocked when she found out that I’d never done something like this to my hair before. She said it was a ‘big jump’ and I said ‘Oh well. Hope it looks cool’ (spoiler- it’s totally wicked).

(My sister and I- we both have blue hair, mine is just a bit more obvious…)

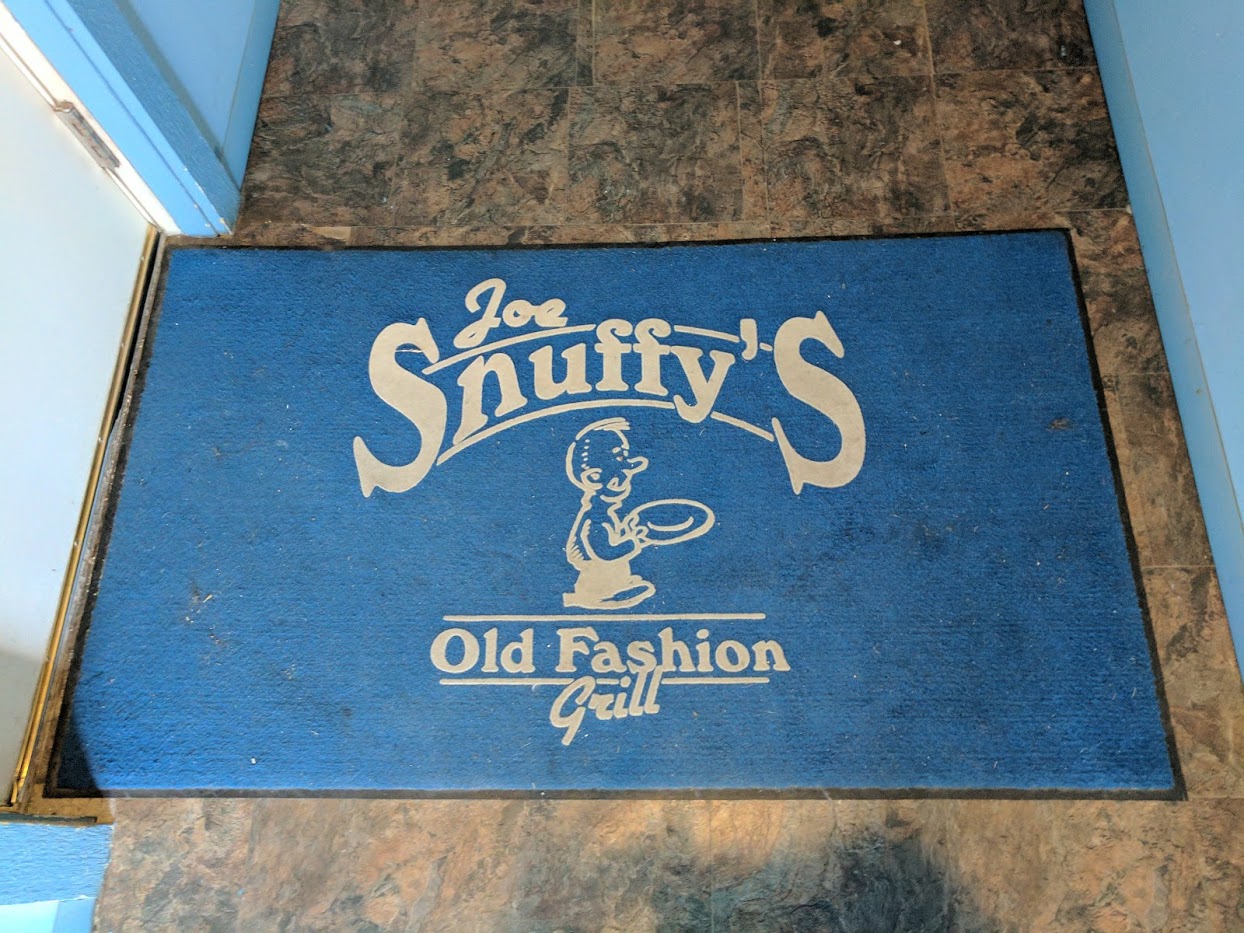
July 29,2017: We hit the ROAD. Actually we drove on it, because hitting it would hurt our hands and we didn’t want a repeat of last year’s arm breaking before we even left (for those of you who don’t know, Mom broke her arm on vacation last year saving puppies from a burning school bus on railroad tracks). We drove about 8 hours to reach the town of Abilene, Kansas where we spent the night. There was a family owned restaurant called Joe Snuffy’s and I totally recommend it. They serve breakfast all day sooooo 10/10. IMG_20170729_190218.jpg
July 30,2017: Abilene is the home of the Eisenhower Presidential Museum. The boyhood home section of the tour was probably my favorite part of the whole museum as it was the most interesting. It showcased a preserved home that Eisenhower lived in as a child, and the home that his parents lived and raised his brothers and sisters in. The boyhood home tour took 15 minutes and I totally recommend it to anyone in the area!

When the family and I had finished ‘oohing’ and ‘ahh-ing’ over the EPM, we moseyed on over to Colorado. Dad let me drive the last four or so hours of the trip, and it rained the last hour (which would have been fine if we weren’t in the mountains, there wasn’t construction, the road lines had been painted on, and my parents weren’t BOTH back seat driving and screaming in general, as if I didn’t know how to drive. Thanks.). We made it to the Buffalo Bicycle Lodge (somehow) and checked in JUST as it stopped raining.

We drove through Garden of the Gods before dinner @ Panda Express and then settled in for the night with hot chocolate and Disney movies.

-That’s all I’m going to post today about the trip, have no fear, I will finish the trip posts! I just want to keep having things to write about, and I don’t want to overwhelm you all at once! <3-

Raye De Sol

Was it real life? Or was it fantasy?

LET ME TELL YALL ABOUT THE TIME THAT NAT AND I GOT TO GO SEE (the remainder of, ft. Adam Lambert) QUEEN IN CONCERT!!!!!!

I will begin by expressing how reluctant I was to hear Adam as the front man for Queen, one of my favorite bands of all time (and no, I do NOT say that about every band I go see in concert). I remember him from his early 2000s music and though I was impressed at the time, and he didn’t strike me as ‘front man for the one of the greatest rock bands of all time’. Now let me tell you how stinkin wrong I was.

Firstly, he came out STRONG and in a pink suit. ‘I’m up here in the gayest suit trying to live up to one of the greatest rockers of all time’ – a paraphrase of Adam Lambert. IT WAS BRIGHT PINK FOR GODS SAKE. He sang a few songs and gave tribute to our man Mercury and said that he wasn’t trying to fill anyone’s shoes (because no one can do that) but that he was up there trying his best. Totally won me over. He was spunky, had great presence (wasn’t trying to overpower the other members, made sure everyone was recognized throughout the course of the night), and he had an AMAZING vocal range. But I’m getting ahead of myself.

Nat and I set out for the United Center around 5pm, 3 hours before the show was supposed to start. This gave us time to drive up, battle traffic and Chicago in general for parking (which we paid like $22 for…. it’s free at Tinley…. #notsalty) and made our way to the shirt booth for our pre-show ritual of buying shirts, going to the bathroom, and finding our seats. As amazing as it was, we ran into someone from high school in the bathroom! It was both shocking and awkward.

Nat and I took the elevators all the way up to the third section, aka nosebleeds as we were about 15 rows from the top of the stadium. This did not decrease anything about the performance, except maybe the quality of the photos and the amount of second hand smoke we inhaled being produced by the lower levels.

Queen was amazing. Adam Lambert was amazing. The awful puns that I was not able to get on camera were a blessing to all those that heard them, and I was in happy tears for most of the performance. Words cannot describe, so here are a bunch of photos of the concert:


To continue our concert ritual, Nat and I stopped at a Steak N Shake on the way home for post concert munchies. As we were inhaling nuggs, I was informed via text that another one of my friends had been at the concert, same level, but on the other side of the stadium with his family! So I did the only thing appropriate and tagged him in my Instagram photos as though I knew he was sitting there the whole time. It was supposed to be funny, but looking back that might be a little weird. Sorry Ben.

I hope all of you are having a great summer and aren’t still in summer school like me! ENJOY THE WEATHER! ❤

RayeDeSol

Update: Here’s a new article that says the same thing but with more info and better quality photos “http://www.mlive.com/music/index.ssf/2017/07/queen_and_adam_lambert_pay_tri.html&#8221;

Word to your Major

Antidisestablishmentarianism. Bet that caught your attention. I can say that now that I’m an English major. I have special powers and whatnots.

For those of you who don’t know, I was accepted into the College of Liberal Arts and Sciences to pursue my new major, English- with the intent of being a high school teacher earlier this summer. The change from Urban Planning to English Teaching is a bit of a leap, I know, but I am so excited that it’s happening. Now, as confident as I have been about this transition I can say without a doubt that I am nervous ALL THE TIME that this will not be the right decision for me, but the support that I’ve had from my friends and family has been amazing! There are so many things that I want to do in the future and so many places and areas of expertise that I want to explore that settling on one major after spending two years here at the U of I and being exposed to all that there is and can be! *breathes* is really hard.

There have been a lot of things piling up this summer, so as you can imagine, I am VERY busy. Summer school has essentially kicked my a$$, and it is so hard to focus on work and school when it’s summer! I have to constantly remind myself that this is so that I don’t have to spend the extra year in college (aka money and soul sucking institution).

As the summer progresses I find it harder and harder to get out of bed and go to work, as I feel like I should be sleeping all day or relaxing down a lazy river somewhere. However, in order to afford any of that, I have to go to work. The circle of capitol is irritating. On that note however, if anyone has suggestions for cheap, fun activities, I’d love to hear them and give them a go! I’m especially always looking for new fun things to write about on this here blog of mine. A distinct lack of topics has recently limited my posts as my funds dwindle to ‘necessities only’, so any suggestions are welcome!

Hope you’re all having a great summer and I can’t WAIT to hear all of the suggestions!

RayeDeSol

Just another Manic Monday

So it’s Monday at the office, I got rained on all the way into work, my headache was back before I even sat down, the carpet still smells (but not as bad) from when the ceiling fell through 2 Fridays ago, the computers in the office all needed to be restarted because of the power outage this last Friday, and I my most recent cartilage piercing is infected.

I didn’t think anything of my newest piercing (acquired on the 4th of July) hurting because it has been so long since I’ve gotten my ears pierced and I’ve never had a cartilage piercing before, so I assumed that it hurt more for a longer period of time, despite the care card I was given saying that it should only hurt for a day or two. Yikes. My ear is swollen and throbs constantly, and IT HURTS. After researching what to do with an infected ear piercing, I have decided that the best course of action is to go home at lunch for some Neosporin, and when I get off work, invest in some salt to make whatever salt scrub was recommended by at least 4 piercing websites. Until then I have been icing my ear (with ice, not frosting) in hopes that it stops feeling hot and that the swelling will go down. Until then, wish me luck!